What Does Failed to Upload Quota Exceeded Mean on Word
Feb xiv, 2022
Domantas G.
4min Read
How to Ready Upload: Failed to Write File to Disk WordPress Error
Download WordPress Cheat Sheet
When you see the Upload: Failed to Write File to Deejay WordPress mistake whilst trying to upload photo for that awesome mail service you just put together, the but reaction can be pure frustration. And while information technology is never desirable to experience errors in WordPress, this one is pretty easy to fix. In this tutorial, nosotros volition discuss various causes of the error, and show you lot how to fix it with easy-to-follow steps.
Why You Get Upload: Failed to Write File to Deejay Error
The Upload: Failed to Write File to Disk WordPress error can surface due to a number of reasons. The virtually typical cause of the error is incorrect binder permissions. But likewise incorrect permissions, this error can also ocurr due to your website exceeding the quota limit of the hosting service. Finally, in some rare cases, you might be experiencing this error due to the filed capacity of the temporary folder of WordPress. Needless to say, all three cases of the error are fixable, and we will show you the solutions to each and every one of them in the following steps.
Choice 1 – Checking Uploads Folder Permissions
Equally stated to a higher place, this is the nearly common cause of the Upload: Failed to Write File to Deejay WordPress fault. Whenever you try to write (upload) files to any one of the folders on your website, the spider web server checks whether the folders are immune to write those files. If whatsoever folder does not take the appropriate permissions, the spider web server is unable to write files to that folder. The same goes for making changes to particular files, as they as well have permissions which make up one's mind the interact-ability with that file. There are iii methods of modifying binder permissions on your web server:
Option ane.1 – Irresolute Permissions with FTP Client
You can alter permissions of files/folders of your website using FTP clients similar FileZilla. First, connect to your hosting using FileZilla. Then, hover over to wordpress installation folder (usually it'southward public_html) and towp-content folder. Now right-click on the folder Uploads. Select File Permissions. You will now come across a new dialog box open up; in the Numeric value section, enter 755. Now, check the Recurse into subdirectories option. This will apply the same permission to all folders inside Uploads. Finally, choose Utilize to directories only in the sub-carte du jour. Finish by clicking OK.
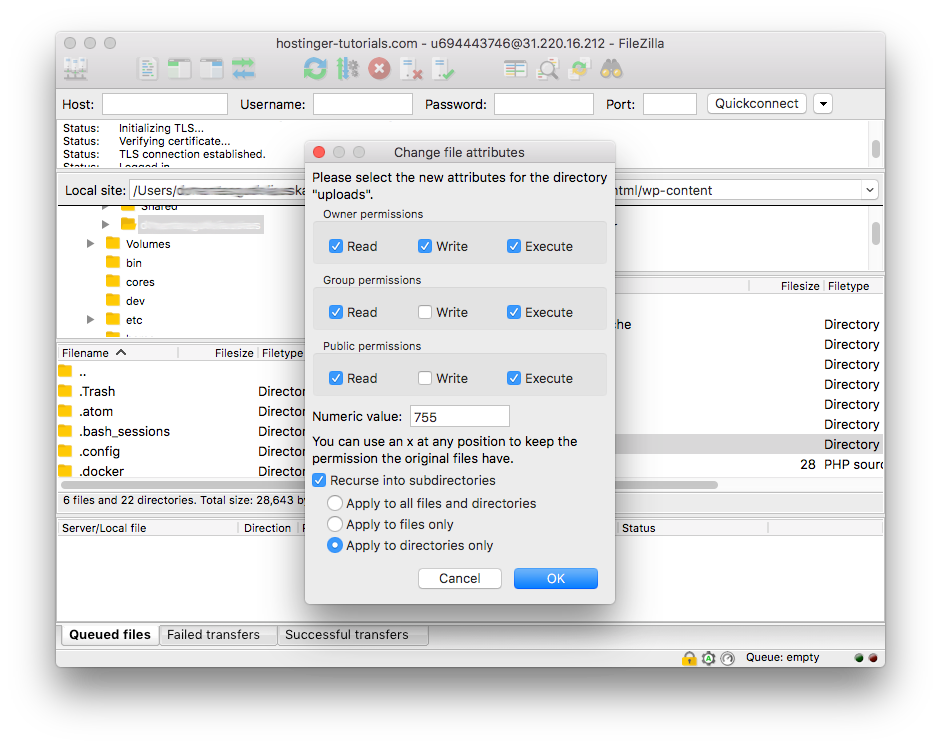
Continue in mind that sometimes, simply changing binder permissions does not work – you accept to change permissions for files residing within the binder too. You can achieve this using FileZilla as well. One time once more, correct-click on the wp-content folder and choose the File Permissions option. Next, enter 644 in the Numeric value field. Finally, check 'Recurse into subdirectories', and this time, select Utilise to files only. Click OK to save your settings.
Selection i.2 – Changing Permissions with Hostinger File Director
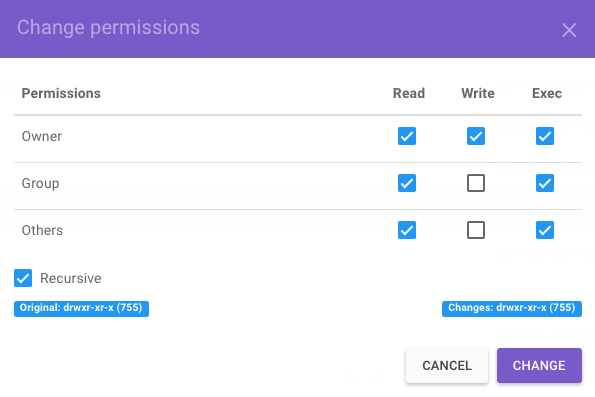
If yous're using a hosting service similar Hostinger, yous can change folder permissions easily through the cPanel provided past the service. To do this, login to your spider web hosting account throughFile Manager.

And so, navigate to the public_html->wp-content folder. In one case inside, you should be able to run into the Uploads folder. Right click on this binder, and then striking on the Permissions button. Now, set the permission to 755 (read and write) for this binder, if it isn't already set.
Try to upload image over again and if the error still pops upward, continue to changing the permissions on private files inside the Uploads folder besides, just like in the previous footstep.
Option 1.3 – Changing Permissions via SSH
On Hostinger shared hosting or VPS you lot tin can modify file/folder permissions viaSSH (meet our tutorial on how to connect to your account or VPS with SSH). To alter permissions using SSH, you only demand to use the chmod command, similar this:
- Offset of all, admission WordPress installation binder. For example, if your WordPress is inside public_html binder, execute:
cd public_html
- Now change permissions to 755:
chmod 755 wp-content
By running the above command, the wp-content binder'southward permission will be ready to 755. If you want to requite the same permission to all files and folders inside this directory, but add the -R flag before 755 in the command.
Option two – Checking Quota Limit
Another cause for Upload: Failed to Write File to Deejay WordPress error is if your website has exceeded the infinite limit of the web hosting service. On Hostinger shared hosting, disk space is unlimited, only many other hosting providers gear up pretty depression limits.
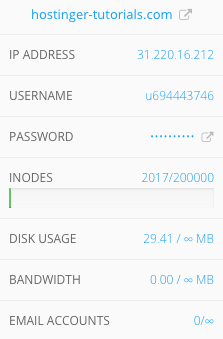
Contrary to popular belief, exceeding the quota limit of your hosting provided isn't that uncommon, specially if your website is rich in content. To notice out whether your website is exceeding the quota limit, follow our dedicated guide. If that is indeed the case, you would want to delete some unused files on the server.
Selection iii – Checking Temporary Folder
If the error however persists, you can be sure that the temporary binder of your WordPress site is filled to its maximum capacity. WordPress works by uploading your content to a temporary location on the server, and and then proceeds to save this content in the Uploads binder. But if the temporary folder doesn't have room itself, and then there is no way for that content to reach the Uploads binder andUpload: Failed to Write File to Diskerror occurs.
If this is the example, you will need to contact your hosting provider. Or clean up temporary binder if you are on VPS, for instructions how to clean upward disk infinite on VPS see this tutorial.
Determination
In this tutorial, we saw how to fix Upload: Failed to Write File to Disk WordPress error. The mistake can be caused by:
- Incorrect file/folder permissions
- Exceeding quota limit of web hosting provider
- Overflow of the temporary binder
Hopefully, past following this guide, yous were able to solve this error, and continue saving media content on your WordPress website. Be sure to cheque out our other WordPress tutorials for quick fixes of WP errors.

Domantas leads the content and SEO teams forward with fresh ideas and out of the box approaches. Armed with extensive SEO and marketing cognition, he aims to spread the word of Hostinger to every corner of the world. During his gratuitous time, Domantas likes to hone his web development skills and travel to exotic places.
Source: https://www.hostinger.com/tutorials/fix-wordpress-failed-to-write-file-to-disk